Spring Garden Preparation Checklist
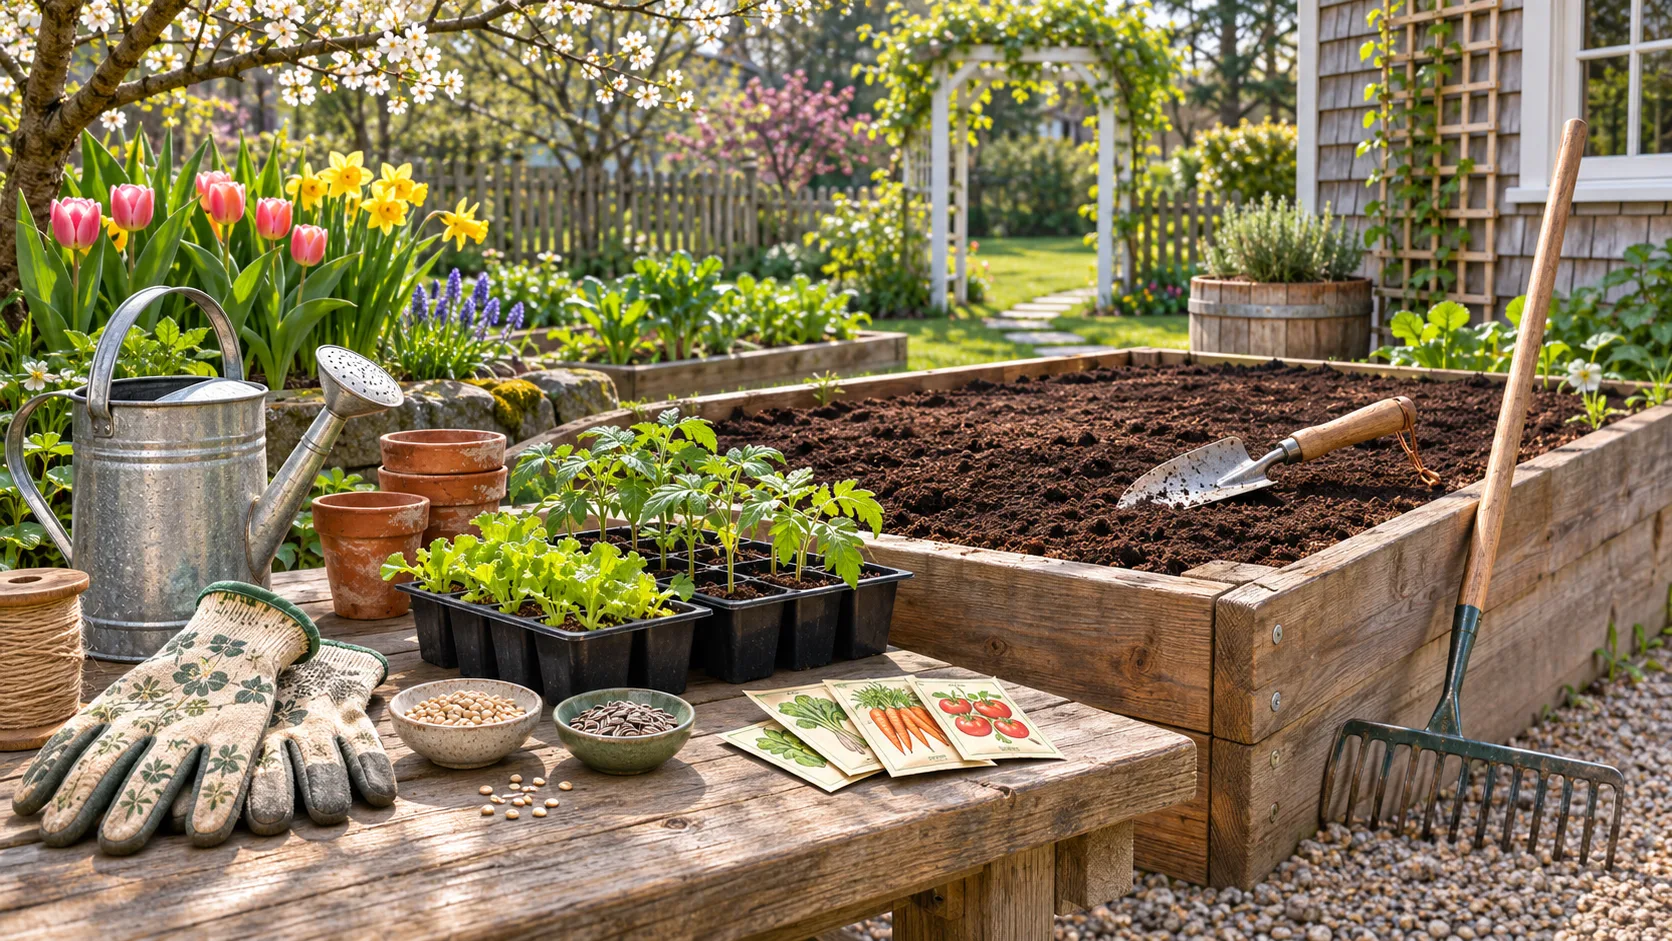
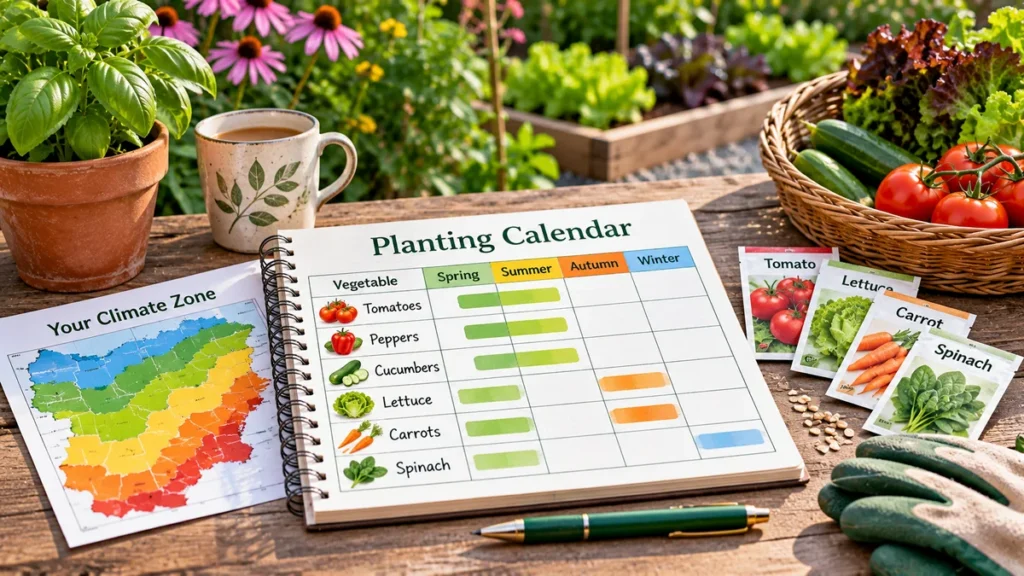
Spring is an exciting time for gardeners. After the slower pace of winter, new leaves begin appearing, flower buds start opening, and vegetable-growing plans become possible again. But before planting everything in sight, it is worth preparing your garden carefully for the growing season ahead. For sowing dates, build a planting calendar around your local climate.
A successful spring garden starts with healthy soil, suitable planting dates, clean and functional equipment, and a realistic understanding of your local weather. Rushing into planting while the ground is saturated or temperatures are still too cold can create problems that last well into summer.
Spring preparation also involves more than digging beds and buying seeds. Established shrubs need inspecting, containers may require fresh growing medium, irrigation systems should be checked, and overwintering beneficial insects deserve consideration during garden cleanup.
This spring garden preparation checklist explains what to do in early, middle, and late spring, with practical steps for vegetable beds, flower gardens, lawns, shrubs, and container plants. The guidance can be adapted to different growing climates, from cool regions with late frosts to warmer areas where spring arrives much earlier.
Quick Spring Garden Preparation Checklist
Before starting major spring gardening work, review these essential tasks. Not every garden will need every activity, and the appropriate timing depends on local temperatures, soil conditions, and the plants you grow.
- Review local frost dates and the upcoming weather forecast.
- Inspect vegetable beds, flower borders, containers, and garden structures.
- Remove dangerous debris, obvious waste, and diseased plant material appropriately.
- Leave suitable undisturbed habitat for beneficial insects where possible.
- Check soil moisture and avoid digging or walking on waterlogged beds.
- Arrange soil testing before applying unnecessary fertilizer or amendments.
- Prepare growing areas using suitable compost or other amendments when needed.
- Choose crops suited to your climate and available sunlight.
- Start seeds at appropriate times and prepare transplants for outdoor conditions.
- Inspect pruning requirements before cutting trees or shrubs.
- Check hoses, irrigation systems, garden tools, and supports.
- Begin regular monitoring for weeds, pests, and plant health problems.
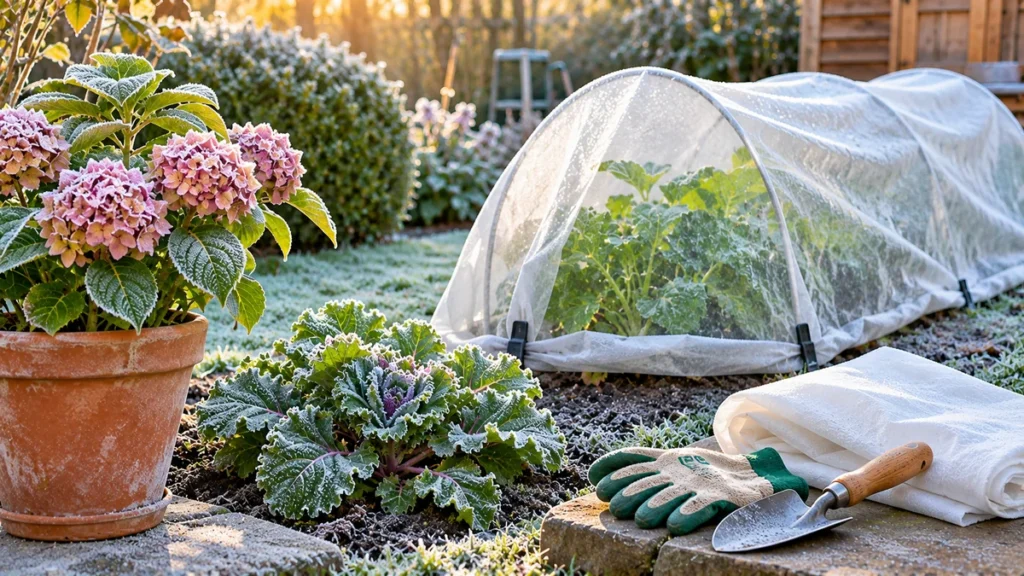
- Protect tender plants when frost or unusually cold weather remains possible.
The goal is not to complete every task on the first warm day. Spring preparation works best as a sequence of manageable jobs carried out when conditions are suitable.
Gardening Tip: Divide spring work into three phases: inspect and plan first, prepare soil and growing spaces when conditions allow, and plant each crop when its temperature and seasonal requirements are met. This reduces rushed decisions and unnecessary replanting.
Step 1: Understand Your Local Spring Growing Conditions
Spring does not begin under the same conditions everywhere. A garden in a mild coastal climate may be ready for early planting while a garden at higher elevation remains frozen or saturated.
Even within the same region, a sheltered backyard can warm differently from an exposed field or a low-lying area where cold air collects.
Check Your Last Spring Frost Date
In frost-prone climates, the expected last spring frost is a useful reference for planning frost-sensitive crops. However, an average frost date is not a guarantee that freezing temperatures will not return.
Tomatoes, peppers, cucumbers, basil, and many tender flowering plants can suffer from exposure to frost or unsuitable cold conditions.
Use local climate records and short-term forecasts rather than relying only on a calendar date. If severe cold remains possible, delay outdoor planting or prepare suitable protection.
Check Soil Temperature Before Sowing
Seeds need suitable soil temperatures for germination. Cool-season crops such as peas, radishes, and spinach may establish during relatively cool weather, while beans, cucumbers, and several other warm-season crops need warmer soil.
A soil thermometer can help confirm conditions at the intended sowing depth. Follow crop-specific guidance instead of assuming that warm afternoon air means the soil is ready.
Consider Your Hemisphere and Climate
In many Northern Hemisphere temperate regions, spring falls between approximately March and May. In much of the Southern Hemisphere, spring occurs around September through November.
These are seasonal generalizations, not universal planting schedules. Tropical and subtropical regions may organize planting more effectively around rainfall, heat, and the availability of irrigation.
Use the weather conditions that define spring in your location rather than copying monthly recommendations intended for another country.
Step 2: Inspect Your Garden After Winter
Before clearing beds or introducing new plants, walk around the garden and assess what changed during winter.
Look for signs of frost damage, fallen branches, drainage problems, damaged supports, broken containers, and areas where water has accumulated.
Check Plants for Winter Damage
Inspect shrubs, perennials, and overwintered vegetables for broken branches, obvious disease symptoms, and signs of new growth.
Some plants emerge from dormancy later than others. A perennial that still looks inactive in early spring may be alive, so avoid removing valuable plants before their expected growing period has arrived.
For woody plants, the presence of firm buds and healthy tissue can provide clues about survival. Where the condition is unclear, allow suitable time for growth to become visible before carrying out major pruning.
Inspect Paths, Raised Beds, and Supports
Check wooden beds for loose joints or deteriorated boards. Repair unstable trellises and inspect supports that will carry climbing vegetables later in the season.
Examine paths for slippery surfaces, displaced stones, or erosion that may make gardening unsafe.
Repairing structures before plants become large is usually easier than working around established roots and stems.
Review Drainage Problems
If water remains standing in planting areas long after rainfall, investigate the cause before adding new plants.
Compacted soil, unsuitable grading, heavy clay, blocked drainage, and other site conditions may contribute to waterlogging.
Adding fertilizer will not solve poor drainage. The priority is to understand the physical growing conditions and determine whether a change in planting location, soil management, or drainage design is appropriate.
Step 3: Clean Up the Garden Without Removing Beneficial Wildlife
Spring cleanup helps prepare growing spaces, but removing all leaves, hollow stems, and plant debris at once can disturb beneficial insects and other small wildlife that have been sheltering through winter.
A thoughtful cleanup balances plant health, access, safety, and habitat preservation.
Remove Hazardous and Unwanted Material First
Start by collecting litter, damaged plastic, broken stakes, and other materials that do not belong in the garden.
Remove obviously rotten produce and plant material associated with serious disease when appropriate. Follow locally suitable disposal recommendations rather than transferring contaminated material into healthy beds.
Preserve Some Undisturbed Habitat
Many beneficial insects spend part of winter in stems, leaf litter, and sheltered areas of the garden. Clearing all organic debris immediately after a brief warm spell may disturb them before they have emerged.
Where practical, leave selected areas of leaf litter undisturbed until local weather has warmed consistently. Hollow stems may also provide habitat for certain insects.
There is no single temperature or date that guarantees all overwintering insects have emerged. Local species and conditions vary, so a gradual cleanup is often a sensible compromise.
Be Careful With Composting
Healthy plant debris may be suitable for composting. However, composting material associated with persistent plant diseases or mature weed seeds requires attention to the composting method and whether sufficiently high temperatures are achieved.
If your home composting system does not reliably reach the temperatures needed to manage particular pathogens or seeds, follow local advice about alternative disposal.
Good to Know: A perfectly bare garden is not necessarily a healthier garden. Suitable organic cover and undisturbed habitat can support soil organisms and beneficial insects. Remove material that presents a genuine problem, but avoid unnecessary wholesale clearing.
Step 4: Check Soil Health Before Preparing the Beds
Soil preparation is one of the most important spring tasks because healthy roots depend on suitable moisture, oxygen, structure, and nutrient availability.
Before digging, assess soil conditions and decide whether any amendments are actually necessary.
Test Soil Before Adding Fertilizer
A laboratory soil test can help identify nutrient levels, soil pH, and other characteristics relevant to plant growth.
For established garden beds, test results help determine whether fertilizer or lime is needed. Adding amendments without evidence may be unnecessary and can create nutrient imbalances.
If you are starting an edible garden on land with a history of industrial activity, demolition, contamination, or other potentially hazardous use, seek appropriate soil safety testing before planting food crops.
Check Whether Soil Is Too Wet to Work
Digging, tilling, or walking over saturated soil can compact it and damage its structure.
Try taking a small handful of soil from the area you intend to prepare. If it forms a sticky, wet mass and stays tightly compressed, it may be too wet for cultivation.
When workable, many garden soils form loose clumps that crumble more easily. The exact behavior varies with soil texture, so use the test as a practical guide rather than a laboratory measurement.
If the soil is saturated, postpone cultivation until it dries sufficiently. Waiting can prevent damage that would otherwise make root growth and drainage more difficult later.
Look for Compaction and Poor Structure
Soil that has been repeatedly walked on or worked while wet may become compacted. Signs can include hard surfaces, poor water infiltration, limited root penetration, and puddling.
Where needed, appropriate soil management, organic matter, permanent paths, and avoiding traffic over planting areas may help improve conditions over time.
Important Caution: Do not dig or rototill a garden bed simply because spring has arrived. Cultivating saturated soil can damage its structure and create long-lasting compaction problems. Wait until the ground is workable.
Step 5: Prepare Vegetable and Flower Beds for Planting
Once soil conditions are suitable, begin preparing the areas where vegetables and flowers will grow.
Remove Weeds Before They Become Established
Early weed control reduces competition for growing space, light, water, and nutrients.
Remove persistent weeds appropriately, paying attention to species that regrow from underground stems or roots. Work carefully around desirable perennials that are just beginning to emerge.
For beds with recurring weed problems, consider longer-term management such as mulching, suitable ground cover, or targeted manual removal.
Add Compost When Appropriate
Finished compost can contribute organic matter and improve the structure of many garden soils. It can help support water infiltration and moisture retention, depending on soil type and existing conditions.
Apply compost according to the needs of the bed and any available soil test recommendations. Excessive compost use can also contribute unwanted nutrient accumulation.
Where suitable, incorporate amendments gently into the surface soil or use them as part of a thoughtful low-disturbance soil management approach.
Level and Arrange Growing Areas
Use a rake to prepare a reasonably even surface for direct sowing. Remove large stones or debris that would interfere with seed placement or plant establishment.
Keep paths separate from the root-growing areas to avoid repeated compaction.
Where raised beds are used, check the edges and the condition of the growing medium. Do not automatically replace all soil each spring unless there is a specific reason.
Choose Suitable Growing Mix for Containers
Ordinary container plants usually need potting mix suited to their species rather than dense garden soil. Container media must provide appropriate drainage, moisture retention, and aeration.
For previously used containers, inspect the mix for compaction, deterioration, and potential disease concerns before reusing it.
Step 6: Plan Which Vegetables and Flowers to Grow
Choosing plants before buying large quantities of seed helps prevent overcrowding and reduces unnecessary spending.
Start with the available sunlight, growing space, local temperatures, and the amount of time you can dedicate to garden care.
Choose Suitable Cool-Season Vegetables
In many temperate climates, early spring can provide suitable conditions for cool-season crops such as peas, lettuce, spinach, radishes, and several brassicas.
However, tolerance to cold weather varies between species, varieties, and growing stages. Some may be direct-sown, while others are often started under protection and later transplanted.
Wait for Suitable Conditions for Warm-Season Vegetables
Tomatoes, peppers, cucumbers, beans, and squash generally need warmer growing conditions.
Planting tender crops into cold soil may result in poor establishment, delayed growth, and increased risk of cold injury.
Use crop-specific recommendations and local forecasts rather than transplanting all warm-season vegetables on the same date.
Plan Flower Beds for Seasonal Interest
Choose annuals and perennials suited to your site’s light and soil conditions. Consider flowering periods, mature plant size, and whether the species will be useful to local pollinators.
Hardy cool-season flowers may be suitable before the weather becomes reliably warm. Tender flowering annuals should be planted after appropriate conditions arrive.
Leave Enough Growing Space
Young seedlings may appear small, but many expand substantially as they mature. Use mature plant spacing rather than placing plants close together only for an immediate full appearance.
Appropriate spacing improves access for maintenance and may support airflow around foliage.
Step 7: Start Seeds and Prepare Young Plants for the Garden
Spring seed starting is an important part of the gardening calendar, but the correct timing depends on the crop and the conditions in which it will grow.
Calculate Indoor Seed-Starting Dates
Some vegetables are started indoors several weeks before outdoor transplanting so that healthy young plants are available when temperatures become suitable.
For example, tomatoes are commonly started indoors approximately six to eight weeks before the anticipated transplanting window. The appropriate period can vary with the variety, growing environment, and local recommendations.
Starting too early may produce seedlings that become crowded or rootbound before they can be planted outside.
Use Clean Equipment and Suitable Seed-Starting Mix
Clean seed trays and suitable growing media help create a consistent environment for young roots.
Provide appropriate moisture, warmth, and light for the crop. Different seeds have different germination requirements, so follow reliable variety-specific instructions.
Once seedlings emerge, insufficient light can cause weak, elongated growth. A bright window may be adequate for some plants, but supplemental lighting is often useful when natural light is limited.
Harden Off Seedlings Before Transplanting
Indoor seedlings require gradual adjustment to outdoor conditions. This process, called hardening off, helps plants adapt to sunlight, wind, and temperature changes.
Begin with suitable sheltered outdoor exposure, gradually increasing time outside as weather permits. The process may take several days or longer, depending on the plant and conditions.
Avoid exposing tender seedlings to damaging frost, strong drying winds, or intense sunlight before they have adjusted.
Direct-Sow When Soil Conditions Are Suitable
Some crops, including peas, beans, radishes, and many root vegetables, are commonly sown directly into their final growing position.
Use the correct soil temperature, sowing depth, spacing, and moisture conditions for the crop.
Check the weather before sowing and avoid creating a wet, compacted seedbed that could reduce germination.
Step 8: Refresh Perennial Beds and Container Gardens
Spring is often a good time to assess established perennials and container plants as they begin active growth.
Inspect Emerging Perennials
Look for healthy new shoots and check whether older leaves or stems are interfering with growth.
Remove clearly dead material when appropriate, but avoid damaging shoots that are just emerging from the crown.
Some perennials are slow to emerge, especially where the soil remains cool. Research the normal growth pattern of the plant before assuming it has died.
Divide Plants Only When Appropriate
Certain established perennials benefit from division when crowded or declining in the center. Spring can be suitable for some species, but others are better divided at a different time.
Follow species-specific guidance rather than dividing every perennial automatically. Newly divided plants require careful establishment and appropriate moisture.
Check Containers for Root Crowding
Roots circling densely around the pot, growing through drainage openings, or a container that dries unusually quickly may indicate that repotting is needed.
Choose an appropriately sized replacement container and use suitable fresh growing medium when necessary.
Do not automatically move every plant to a much larger pot. Excess unused potting medium may remain wet for too long around a small root system.
Clean and Prepare Reusable Pots
Wash containers to remove old soil and debris before reusing them. If disease is suspected, follow appropriate sanitation procedures for the container material and growing environment.
Check that drainage holes are open and the container remains structurally safe.
Step 9: Prune Garden Trees and Shrubs at the Correct Time
Spring pruning can help manage the structure and growth of some garden plants, but it is important to understand when each species forms its flowers.
Avoid Cutting Spring-Flowering Shrubs Too Early
Many spring-flowering shrubs develop their flower buds on growth produced during the previous growing season.
Examples include forsythia, flowering currant, mock orange, and weigela. Pruning these plants before flowering can remove the buds responsible for that season’s display.
Where regular pruning is needed, these shrubs are commonly pruned after flowering. Follow advice for the particular species and its growth habit.
Some Summer-Flowering Shrubs Are Pruned in Spring
Certain shrubs flower on growth produced during the current growing season. For suitable species, pruning in late winter or early spring can encourage fresh shoots that flower later.
Examples include certain buddlejas, caryopteris, and panicle hydrangeas, although requirements depend on the cultivar and climate.
Do not apply this timing to all flowering shrubs, trees, or evergreens.
Remove Hazardous or Damaged Growth Safely
Small dead or damaged stems may be removed using suitable, clean tools when appropriate.
Large branches, unstable trees, work at height, or branches near power lines should be handled by properly qualified professionals rather than treated as ordinary home-gardening tasks.
Check for Nesting Wildlife Before Pruning
Spring may coincide with bird nesting and other wildlife activity. Inspect shrubs and trees before pruning and avoid disturbing active nests.
Wildlife protection laws vary by location, so check relevant local rules before undertaking substantial vegetation clearance.
Step 10: Prepare Watering Systems and Refresh Mulch
As spring growth increases, plant water demand often rises. Preparing irrigation equipment early can help prevent problems later when temperatures become warmer.
Inspect Hoses and Irrigation Equipment
Check garden hoses, connectors, drip lines, watering cans, and irrigation timers for damage or leaks.
Test drip emitters and soaker hoses to ensure water reaches the intended root zones. Repair blocked or damaged components before the garden becomes densely planted.
Adjust Watering to Spring Conditions
Spring watering should reflect rainfall, soil moisture, plant size, and temperature.
New seedlings may need careful attention to moisture near the surface, while established plants may require less frequent irrigation when the soil remains adequately moist.
Avoid watering by an unchanging daily schedule without checking actual growing conditions.
Apply Mulch at the Appropriate Time
Mulch can reduce weed growth, conserve soil moisture, and moderate soil temperature changes.
For many established beds, a suitable layer of organic mulch can be useful after soil preparation and planting. However, heavy mulch on very cold spring soil may slow warming in some locations.
Keep mulch away from sensitive stems, woody trunks, and plant crowns. Do not bury new seedlings under thick layers of material.
Maintain Suitable Lawn Conditions
Where a lawn is part of the garden, inspect it for winter damage, compaction, drainage problems, and bare areas.
The appropriate time for overseeding, fertilizing, or major lawn renovation depends on the grass species and climate. Cool-season lawns and warm-season lawns have different periods of strongest growth.
Avoid treating all lawns according to one spring schedule. Use locally appropriate lawn-care recommendations.
Step 11: Monitor Weeds, Pests, and Plant Diseases Early
Spring is a useful time to establish a simple plant-monitoring routine. Early observation can help distinguish routine seasonal growth from developing problems.
Inspect New Growth for Pests
Aphids and other sap-feeding insects may gather on tender new shoots. Some caterpillars and beetles can also damage developing foliage.
Inspect both sides of leaves and look for direct evidence such as insects, eggs, droppings, or feeding marks.
Not every insect requires treatment. Ladybird beetles, lacewings, hoverflies, and many other organisms contribute to natural pest control.
Watch for Disease Symptoms
Unusual leaf spots, stem discoloration, rotting seedlings, or persistent wilting may indicate a disease or an environmental problem.
Correct identification matters because watering problems, nutrient stress, frost injury, and pests can create overlapping symptoms.
Promote appropriate airflow, avoid unnecessary leaf wetness where possible, and follow crop-specific guidance if an infectious disease is suspected.
Avoid Routine Pesticide Applications Without a Diagnosis
Applying pesticides before identifying a pest can be ineffective and may harm beneficial organisms.
Use monitoring and proportionate management methods. When treatment is justified, follow locally approved product labels and consider possible impacts on pollinators, edible crops, and nearby water sources.
Record recurring problems so that preventive strategies can be improved in future seasons.
Early, Mid, and Late Spring Gardening Task Comparison
This table provides a flexible order for spring preparation in a typical temperate climate. Actual tasks may overlap or shift according to local weather.
| Spring phase | Main garden tasks | Important considerations |
|---|---|---|
| Early spring | Inspect winter damage, plan crops, test soil, assess drainage, clean tools | Avoid saturated soil and premature planting |
| Early to mid spring | Prepare workable beds, manage weeds, sow suitable cool-season crops | Use local soil-temperature and frost guidance |
| Mid spring | Monitor seedlings, prepare supports, refresh suitable containers, inspect irrigation | Protect tender plants from unstable weather |
| Mid to late spring | Harden off suitable transplants, establish plants as conditions allow, monitor pests | Check nighttime temperatures before planting tender crops |
| Late spring | Plant suitable warm-season crops, adjust watering, maintain mulch and spacing | Respond to actual warmth, rainfall, and plant growth |
| Throughout spring | Inspect plant health, maintain paths, monitor weeds, and update gardening records | Do tasks as needed rather than following a fixed date |
A Simple Weekly Spring Garden Routine
During the main spring growing period, a short weekly inspection can help keep the garden manageable.
- Check the weather forecast for frost, heavy rain, wind, and temperature changes.
- Inspect seedlings and young transplants for moisture stress and pests.
- Check whether any growing areas are still too wet to work.
- Remove troublesome weeds before they spread extensively.
- Inspect plant supports, containers, and drainage.
- Review seed-starting dates and upcoming transplanting windows.
- Record what you planted, when it germinated, and how it is growing.
This small routine is often more useful than completing every gardening job in one long weekend.
Common Spring Garden Preparation Mistakes to Avoid
1. Planting Tender Crops Too Early
A few warm days do not guarantee that frost risk has passed or that soil temperatures are suitable for warm-season vegetables.
Check forecasts, local planting windows, and the temperature requirements of the crop before sowing or transplanting.
2. Digging Soil While It Is Too Wet
Working saturated soil can lead to compaction and poor structure. Wait until the planting area has dried sufficiently before major cultivation.
3. Applying Fertilizer Without Checking Soil Needs
More fertilizer does not automatically mean healthier plants. Excess nutrients may create imbalances, contribute to soluble salt problems, and increase environmental losses.
Use soil testing and crop-specific recommendations where practical.
4. Clearing All Garden Debris Immediately
Removing every stem and leaf at the first sign of warm weather can disturb beneficial overwintering organisms.
Prioritize unsafe or diseased material and maintain some suitable habitat when practical.
5. Pruning Spring-Flowering Shrubs Before Blooming
Many spring-flowering shrubs develop their flower buds on the previous year’s stems. Cutting them too early can remove the flowers.
Confirm the plant species and recommended pruning time before cutting.
6. Starting Too Many Seeds at Once
Large quantities of seedlings can become difficult to manage without adequate light, growing space, and a realistic transplanting plan.
Start with manageable numbers and sow each crop at the appropriate time.
7. Forgetting to Harden Off Transplants
Plants raised indoors may be damaged when moved directly into strong sunlight, cold winds, or large temperature changes.
Acclimatize seedlings gradually before permanent outdoor planting.
8. Ignoring Drainage and Root Health
A garden bed that remains waterlogged can struggle despite receiving compost, fertilizer, or other amendments.
Investigate the drainage problem rather than assuming that additional nutrients will solve poor growth.
9. Using the Same Spring Schedule Everywhere
Garden calendars vary by climate, hemisphere, elevation, rainfall, and local temperatures.
Adapt planting decisions to your actual growing conditions instead of using generic dates from another region.
Frequently Asked Questions About Spring Garden Preparation
When should I start preparing my garden for spring?
You can begin planning, checking tools, inspecting garden structures, and arranging soil tests before planting weather arrives. Major soil preparation should wait until the ground is workable and not saturated. Planting dates depend on the crop and local conditions.
What is the first thing to do in a garden after winter?
Start with an inspection. Check plants, beds, soil moisture, drainage, paths, containers, and supports. Identify damage and the most important repairs before disturbing the growing areas.
Should I remove all dead leaves and stems in spring?
Not necessarily. Some leaf litter and standing stems can shelter beneficial insects through winter. Remove hazardous waste and manage diseased material appropriately, but consider gradual cleanup and retaining suitable habitat where practical.
How do I know if my soil is ready for planting?
Check moisture and texture. Soil that is sticky and remains compressed may be too wet to cultivate. Many workable soils crumble into smaller clumps rather than forming a saturated mass. Also check that soil temperature is suitable for the crop you intend to plant.
Should I add compost to my garden every spring?
Compost can improve many soils, but it is not always necessary to apply large amounts every year. Consider existing organic matter, nutrient levels, soil test results, and crop needs before adding amendments.
What vegetables can I plant in early spring?
Depending on local conditions, peas, radishes, spinach, lettuce, and certain brassicas may be suitable. Their planting windows and cold tolerances differ, so follow regional crop-specific guidance.
When should I plant tomatoes and peppers outside?
Tomatoes and peppers generally need reliably warm growing conditions. Consider local frost risk, nighttime temperatures, soil warmth, and whether transplants have been hardened off. Avoid using a universal planting date.
Is spring the best time to prune every shrub?
No. Pruning time depends on the species and when it forms flower buds. Many spring-flowering shrubs are pruned after blooming, while some summer-flowering shrubs can be pruned in early spring. Check species-specific recommendations first.
Do I need to fertilize plants as soon as spring starts?
Not automatically. Fertilizer needs depend on the plant, soil nutrient levels, growing conditions, and stage of growth. Some plants may already have sufficient nutrients, while others benefit from an appropriate application during active growth.
Can I prepare a garden without digging or tilling?
Yes. Many gardens can be managed with limited soil disturbance, appropriate surface amendments, mulch, and permanent paths. Whether additional loosening is needed depends on compaction, existing soil structure, and the intended planting.
Final Thoughts
Preparing a garden for spring is about creating suitable conditions for healthy growth rather than rushing to plant everything as soon as the weather becomes warmer.
Begin by reviewing local temperatures and frost risk, inspecting plants and garden structures, and checking soil moisture and drainage. Prepare beds when the soil is workable, choose crops suited to the season, and give seedlings time to adjust before transplanting.
Thoughtful cleanup, appropriate pruning, careful use of compost and fertilizer, and early pest monitoring can help reduce avoidable problems later in the growing season.
Remember that spring preparation does not have to happen in a single weekend. A few well-timed tasks, completed when conditions are right, are often more valuable than extensive work carried out too early.
For more seasonal gardening advice, explore our Seasonal Gardening guides. You can also browse Vegetable Gardening for growing advice and Soil & Watering for help improving soil and moisture management.
Further Reading and Horticultural References
- University of Maryland Extension: How to Start a Vegetable Garden — planning, soil preparation, site selection, and vegetable gardening fundamentals.
- University of Maryland Extension: March Gardening Tips and Tasks — spring soil management, planting preparation, and garden maintenance.
- University of Minnesota Extension: Planting the Vegetable Garden — soil workability, planting temperatures, and vegetable establishment.
- University of Minnesota Extension: Spring Yard and Garden Preparation — spring cleanup, overwintering insects, seedlings, and landscape plants.
- Royal Horticultural Society: Pruning Early-Flowering Shrubs — appropriate pruning times for common spring-flowering plants.
- University of Maryland Extension: Planning a Vegetable Garden — garden layouts, soil quality, and growing-site preparation.
- University of Minnesota Extension: Tips for Climate-Ready Gardening — avoiding wet-soil compaction and responding to spring weather variability.